Easy Mounting Guide for Fake Dome/Bullet Cameras: Step-by-Step Instructions
Understanding and optimally deploying Fake Dome or Bullet Cameras is key to enhancing exterior secur…….
Understanding and optimally deploying Fake Dome or Bullet Cameras is key to enhancing exterior security. These tech-driven devices blend seamlessly into landscapes, offering night vision, motion detection, and weather resistance. Mounting them properly on clean surfaces with durable brackets ensures stability and maximized surveillance capabilities. Using lockable hardware safeguards against tampering, while a final inspection guarantees accurate alignment, cable protection, and clear image capture for discreet yet effective security monitoring.
“Transform your outdoor security with a simple upgrade: installing an exterior fake CCTV camera. This step-by-step guide covers everything from selecting the right ‘fake dome’ or ‘bullet’ camera to final testing. First, understand your camera’s design and choose a mounting surface suitable for your needs. Prepare the area, attach the camera securely, and ensure all hardware is fastened tightly. Finish with thorough checks to maximize the deterrence factor of your new security measure.”
- Understanding Your Fake Dome or Bullet Camera
- Preparing the Mounting Surface
- Attaching the Camera to the Mount
- Securing the Mounting Hardware
- Final Checks and Testing
Understanding Your Fake Dome or Bullet Camera
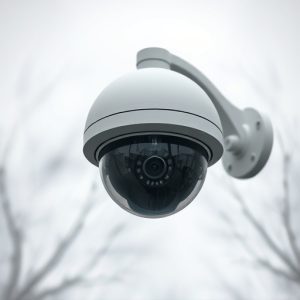
Understanding your Fake Dome or Bullet Camera is a crucial first step in ensuring effective exterior surveillance. These innovative security devices blend seamlessly into their surroundings, appearing as everyday light fixtures or decorations, but packing advanced surveillance technology inside. The ‘fake’ aspect cleverly disguises them as regular items, making them less noticeable and more effective deterrents against potential intruders.
Each camera offers a unique design, typically featuring a dome or bullet shape, with various features like night vision capabilities, motion detection, and weather resistance. Familiarizing yourself with these attributes will help in choosing the right placement for optimal results. Whether you opt for a dome that blends into your façade or a bullet-shaped model that can be discreetly mounted on walls or fences, understanding the camera’s specifications will enhance its performance as a surveillance asset.
Preparing the Mounting Surface
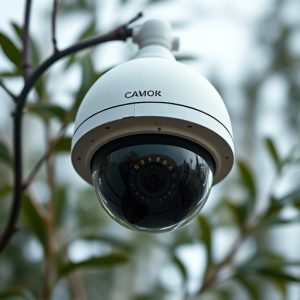
When preparing your exterior mounting surface for a Fake Dome or Bullet Camera, it’s crucial to start with a clean and level base. Remove any debris, dirt, or existing structures that might obstruct the camera’s view. This includes branches, plants, or old fixtures. Ensure the area is free from any obstructions to guarantee optimal visibility and efficient surveillance.
For the best results, use a suitable mounting bracket designed for outdoor applications. Securely attach the bracket to the surface, ensuring it can withstand external elements. Whether you’re fixing it to wood, metal, or concrete, make sure the bracket is firmly in place. This step is essential for the camera’s stability and overall performance, allowing your Fake Dome or Bullet Camera to function at its peak.
Attaching the Camera to the Mount
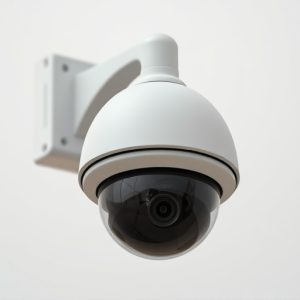
Attaching your fake dome or bullet camera to the mounting bracket is a straightforward process that ensures optimal positioning for clear, unobstructed surveillance. Begin by securing the camera firmly onto the mount using the provided screws and washers. Ensure the camera is level by aligning it with the mounting surface and adjusting until perfect symmetry is achieved. For a Fake Dome Camera, carefully twist the dome to lock it in place, providing a discreet and seamless installation. Alternatively, Bullet Cameras offer quick-release mechanisms, allowing for easy attachment and detachment as needed.
Once attached, double-check all connections and fasten any additional components, such as cables or power supplies, securely to prevent accidental dislodging. Properly mounting your camera is key to reaping the benefits of enhanced security and peace of mind that comes with clear, high-quality surveillance footage.
Securing the Mounting Hardware
When securing the mounting hardware for your fake dome or bullet camera, it’s crucial to ensure stability and discreet placement. Start by attaching the provided brackets to the wall using suitable fasteners. These brackets are designed to accommodate various wall types, be it brick, concrete, or wood, so choose the appropriate screws or anchors accordingly.
For added security, consider using lockable hardware. This simple step enhances protection against potential theft or vandalism, especially if your camera is positioned in a visible area. Ensure all components are securely fastened before moving on to the next installation phase.
Final Checks and Testing
Before finalizing the installation, conduct a thorough inspection to ensure all components are securely attached and aligned correctly. Check that the camera is level and pointed in the desired direction, offering optimal coverage. Verify all cables are properly connected, sealed, and free from damage, especially when routing them through walls or ceilings. This step is crucial for maintaining the integrity of your security system.
Once the physical setup is complete, it’s time to test the functionality. Turn on the camera and ensure it captures clear images or video. Adjust settings if necessary to optimize picture quality. Verify that the camera’s motion detection works accurately, triggering alerts when expected. By ensuring these final checks and testing, you can be confident in the performance of your Fake Dome or Bullet Camera, enhancing your home or business security with a discrete yet effective surveillance solution.
Mounting a fake dome or bullet camera is a straightforward process that can significantly enhance your security system. By following these simple steps, you can ensure your camera is securely installed and optimized for clear, effective surveillance. Remember to prepare the mounting surface thoroughly, attach the camera with care, and double-check all hardware for a robust setup. With these exterior fake CCTV mounting instructions, you’re now equipped to transform your space into a safer, better-monitored environment.